
Cherry Studio configuration
Cherry Studio is a desktop AI chat tool. It not only supports built-in providers, but also can connect AI providers, secondary development panels, or privately deployed OpenAI-compatible interfaces. Configuration entry is centralized in Settings - Model Services, just follow the official documentation's "Custom Provider" process.
First understand custom providers
Here, "provider" can be understood as the channel through which Cherry Studio accesses the model. The AI provider gives you the Key, API address, and model name, and Cherry Studio is responsible for sending chat queries to this channel and displaying the responses back.
For beginners configuring for the first time, it is recommended to only add one provider and first get text chat running; once the Key, API address, and model ID are all correct, then continue to add a second provider or other models.
Add a new provider or select an existing provider
Open Cherry Studio, click the gear icon on the left to enter Settings, select Model Services. If there is already an available OpenAI or OpenAI-compatible provider in the list, simply click on it to fill in the Key, API address, and model; if there is no suitable entry, click below the list + Add Create a new provider.
When adding a new provider, the provider name is just a display name for yourself. You can enter the provider's name or 'such-and-such AI provider'. If your AI provider indicates an OpenAI-compatible interface, select the provider type according to the official documentation OpenAI.
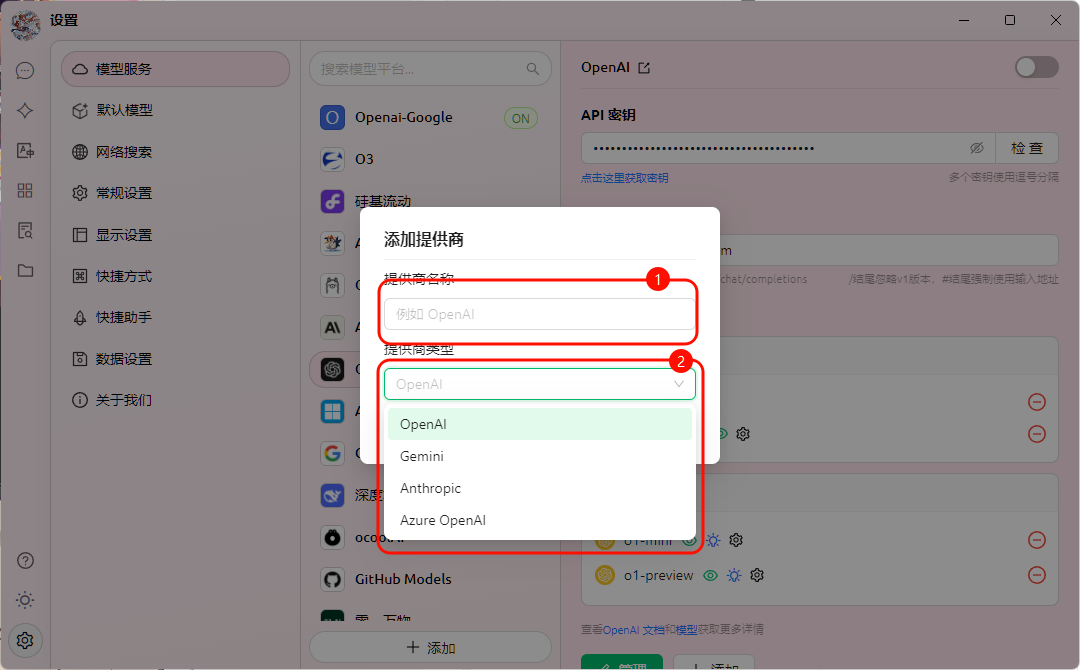
Fill in the API Key and API address
| Configuration item | Filling Method |
|---|---|
| API Key | Copy it from the provider's backend token, Key, or API Key page. Do not enter your account password, and do not copy the sample from screenshots. |
| API address | That is, the Base URL / API link. It might be the site domain, or you may need to add /v1 at the end, following the provider’s backend or documentation. |
| Enable switch | The switch on the right of the provider list must be turned on; otherwise, even if the information is correct, it will not be selectable on the chat page. |
| Check | After filling, first click Check or Save. If the check fails, first verify whether the Key is valid, whether the API address is correctly copied, account balance, and model permissions. |
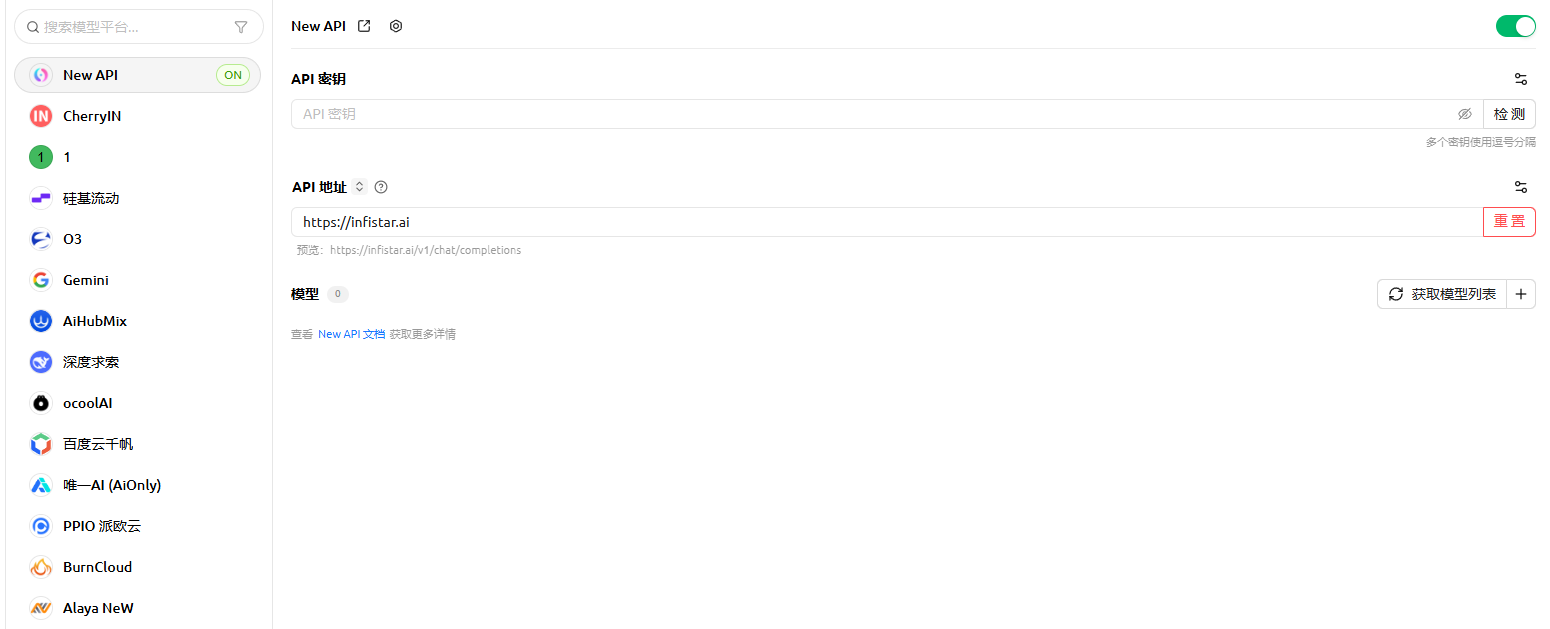
Obtain the model list or manually add models
First, try to let Cherry Studio get the model list from the provider's interface; if it cannot get it, then manually add models according to the official documentation. The most crucial thing here is Model ID / Model Name: Just fill in whatever is written in the backend model list, do not change the case, hyphens, or periods; the model name and group name are only for display on the interface, and can be written in a more recognizable way.
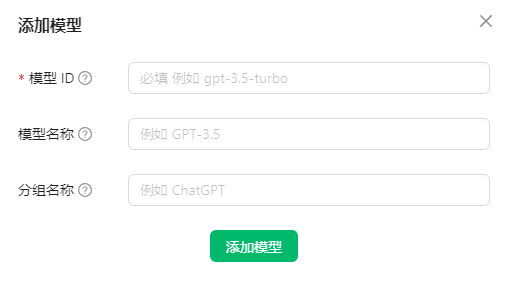
- First, click buttons like 'Get Model List', 'Check Connection', or 'Refresh Model List' to see if Cherry Studio can automatically detect available models.
- If it cannot be obtained automatically, click again in the model area Management or Add.
- In Model ID / Model Name, enter the original identifier in the provider backend model list, for example
gpt-4o,deepseek-chat. - The interface display name and group name can use any clear, recognizable label, but the model ID / model name should not be changed at will.
- After saving, go back to the chat page, select the model you just added, and send a short message to test it.
Please reply only: Cherry Studio configuration successful| Phenomenon | Reason | Handle |
|---|---|---|
| Failed to get the model list | The provider has not opened the model list interface | Manually add the model name displayed in the backend |
| Can access but cannot chat | The model name is visible, but the account does not have permission | Switch to a model that has been activated, or check your balance and model permissions |
| Image model unavailable | The provider only supports the text interface | Do not forcibly call the image interface using the regular chat configuration |